Monday, May 30, 2011

Explanation

A class is a series of components and instruction which are used to create objects. Classes contain constants and variables so the objects which are created are similar but able to have variation. When creating the objects the constant components are parts of the code which never change, and the variables are the components which allow the object to have difference.

For example the constant when build a bicycle are always having two wheels and handle bars and the variables are things such as the colour and speed. Each even though when building bikes they can look different and travel at different speeds they are still all bicycles.

With my project I have demonstrated this by creating a pattern generator which can then be used to create real world objects. The generator is like the class. It uses constants and variables to create coasters which are in essence all the same but varied to make each one unique. The pattern generator (class) uses a geometric pattern (constant) as a base to create a different organic design (variable). Each pattern produced is different and is then laser cut to produce unique coasters (objects).

They even work as coasters


Results!


So it turns out each one of these coasters takes between 8 and 12 minutes to laser cut because of the complex engraving. I only was able to get an hour of laser cutting time so this is why I have created a set a of 5. Each one is different and I tried to use a range of different engraving to show the variety which can be achieved.
Ready for Laser Cutting

Here are some coasters ready for laser cutting. The red lines are cut lines and the black are engrave lines. The area where the lines are generated from was really dense and would take for ever to engrave so I decided to cut the geometric pattern out to save time and and money.

Also after talking to Luke I decided to make the corners of the coasters round because it automatically makes them look more coaster like.

Pattern Generator

Final Geometric Pattern

I have decided to use this as the base pattern for my coasters. I think when I put it in the pattern generator it will create a range of interesting patterns.

Looking at Geometry

Exploring different geometric patterns to use as the base of my coasters

Thursday, May 26, 2011

Coded Coaster

I'm going to make coasters.

I was trying to think of what i could make from my code that wasn't just a random lump of laser cut stuff. Options included
  • jewellery
  • scarfs
  • coasters
Making jewellery would be cool but a lot of other work and cost would go into creating these, scarfs would also be cool but I'm not sure about laser cutting fabric and once again the cost would be a lot higher. This lead me to coasters and the when I came across Studio Trivetz by Modern-twist and Nervous System I decided to commit to the idea because they are a simple object which can be highly effective. Also nervous Modern twist and Nervous System's coaster are all the same each one of mine is going to be different
I've been finding it really hard to create my own generative design code from scratch especially when the Nagual code is pretty much exactly the sort of code I want. It uses shapes with geometric structure and creates curved line patterns around this to give the appearance of structured randomness.

I'm going to use the Nagual code as a basis and create my own structured geometric pattern which I can use as the base.

Wednesday, May 18, 2011

I LOVE THIS CODE

Swirly Paths

This code is pretty awesome and a very good example of a generative pattern maker.I am now going to go on to processing and try figure out how it works and cobble together my own pattern generator.

Pattern 4 is my favourite

Monday, May 16, 2011

Cost

Code = free
Laser cutting
  • $5per half hour
  • $4 for a sheet of 300x300 acrylic
I estimate I will need 1 hour of laser cutting and probably 2 sheet of acrylic

Printing will also be involved I will allow $5 for this

Total Cost = $23

I think this will be enough however I will budget $35 which includes ' just in case something goes horribly wrong money'

Plan B

If making the video is not possible I will create an explanatory picture expressing the process to accompany the laser cut objects

Time Managment

This week
  • Produce code to generate patterns
  • Do some small test prints to get a sense of the results produce
  • Refine code based on finding during test.
Next Week
  • Finalise code
  • Produce a series of laser cut object (film the cutting)
  • create a film using the laser cut footage and footage of the code being draw
  • Write 200-300 words.

So what would I actually show in the exhibition

In the exhibition I would have a video showing the code being drawn in processing and it being laser cut at the same time. Beside this I would have I series of laser examples which would be chosen to highlight the similarities and difference of within the objects.

My idea

The class would be...

A code which creates a vector pattern that would then be used to create a laser cutting file.

Each time the code is run the same the same pattern will start to generate this will be the constant

The variables will be the time the code is run for (the longer it's run the more complex the pattern will get) and the colour of the line either red or black (red is the cut colour for laser cutter and black is the engrave colour)

The laser cutting files will then be used to produce plastic replicas of the code which will be the object.

Nervous System

Nervous System uses generative design methods to create their products.

I would the to use the idea of generative design to produce me 'blueprint' or 'class' that would then be used to create real world objects.

Ideas to explain classes and object

Having a PLAN to produce a PRODUCT

I would like to use the idea of blueprints and plans to explain classes and objects.

The blueprint/plan must contain constants and variables and then be used to create multiple objects based on these plans.

I would also like incorporate using coding and production of actual 3d real world object in my working as this is something that really interests me.

Simple Class example

the pervious two example of class I showed were very complex ones so here is the code for a very basic object and class based example.
HLine h1 = new HLine(20, 2.0);
HLine h2 = new HLine(50, 2.5);
void setup()
{
size(200, 200);
frameRate(30);
}
void draw() {
background(204);
h1.update();
h2.update();
}
class HLine {
float ypos, speed;
HLine (float y, float s) {
ypos = y;
speed = s;
}
void update() {
ypos += speed;
if (ypos > width) {
ypos = 0;
}
line(0, ypos, width, ypos);
}
}

In this code two objects, h1 and h2 are created from the class HLine.
The constant in the class in the x position of the line which is from0 to the width of the screen and the variables are the y position and speed at which the lines move

Metaphors for Classes and Objects

Recipes in cooking

A cupcake recipe contains instruction on how to make a cupcake. The basic ingerdentis for making a cupcake are the like the constants in a class. The variables are the things such as the different toppings and decorations you can place on them

Patterns for making clothes

The sewing insturction are like the constant in the class and different fabrics used are like the varirables.

Examples of using classes

Straggle

This code uses several class functions to control different aspects of the lines.

Particle Class
This holds info and functions pertaining to each line's vectors

The Line Class
Line segment information is stored here. It keeps track of the line's hue

Canvas Class
Keeps track of the lines in here. The Canvas Class just holds all the coordinate data, and provides a function for drawing everything.

The classes provide the information need to to draw the lines just as blue prints provide the information to build an object or machine

Rotate


This example only has one class which is the particle class. Each particle is created and then controlled by information provided in the class.

9000 particles are created and then each one is controlled by the variables in the class

Object (Plane)

Class (blueprint)


The blue print of the plane is like the class. It contains the information on how the plan should be made, if something in the class changes then the object will change.

Thursday, May 5, 2011

CLASS

In a very simple terms a class ...

has a set of components from which objects are created

An object contains a state and behaviours

for example in the real world a chair is an object and the blueprints used to build it are the class

Idea change....

I really would prefer to make something in code rather than in real life because making models is something I already can do and I would like to use as many opportunities as possible to expand my code and computer skills.

Also I think I want to pick a slightly harder programming term because I think If/Else is pretty simple and self explanatory

Monday, May 2, 2011

How to explain If/Else

I want to create a 3d interactive model which will prompt the user to alter the model in some way based on a choice they make. For example there will be two different ways you can rotate the model and different shapes will form based on the desisions made.

I think this will help illustrate the term If/Else becaues if/else is used to make different things happen in the code and create different results which is what will happen with my model.

Possible Programming Terms

If

If is a control statement and decides which code should be preformed.
  • if x = true do something
  • if x = false don't
Else

Else expands on if and allows the program to chose between two or more blocks of code.

  • if x = this do something
  • else do something different

Project Three - Coding Exhibition

Tuesday, April 26, 2011

After the Presentation

based on the comments I got received during my presentation I have decided not to do any further development on my transformation. I am happy with the way it has turned out and think further tweaking is unnecessary

Wednesday, April 13, 2011

Final

http://www.openprocessing.org/visuals/?visualID=26978

This is my final interaction. I tried experimenting with colour but thought because of the amount of dots and movement it was overwhelming and unnecessary. I am happy with the way the sound and visual interact with the mouse and think it is good example of transformation.

Yes more development

Development Six


As you get deeper into space there are more stars and more spaceships.

I now want to work on the colour scheme and transparentness to make it more space like but still keep it abstract

BLEEP

In the original code the bleeps were formed by a line moving across the screen and making a noise the they passed over a line that had been drawn. I changed the line to a dot and when it pass a dot that has been drawn lots of dotted lines appear around it like is is sending a signal. I think this look is in keeping with the idea of outer space, like the dot is a little space ship travelling through the universe sending out messages to other space ships.

The development continues

Development Six
http://www.openprocessing.org/visuals/?visualID=26622

The build up of dots and patterns formed remind me of outer space and millions of stars. I want to try using this idea of space to better integrate the bleeps that are created when you click.

Adding Sound

Development Five
http://www.openprocessing.org/visuals/?visualID=26926

Adding sound and visuals together. I need to edited the volume and pitch of the noise. I want to try making it so when you click and new visual element and sound will be generated

Helpful code

The pieces of code both have sound elements that I think will be useful for creating my sound code. I think this is a good starting point because I don't really have any idea how to generate sound and by dissecting and analysing these bits of code I will be able to better understand how to use it.

http://www.openprocessing.org/visuals/?visualID=15427

and

http://openprocessing.org/visuals/?visualID=25795

Progression of Imagery

Development One
http://www.openprocessing.org/visuals/?visualID=26910

Development Two

Development Three

Development Four

Monday, April 11, 2011

STORYBOARD

STORYBOARD GOES HEAR!

Attempting Transformation


http://www.openprocessing.org/visuals/?visualID=25573

This is just and example of me playing around with interaction and 3D to see what patterns I could create and make myself more familar with it.

Sound waves


For my transformation interaction I want to try using the way sound waves combine visually and audibly to form different visual patterns and sounds
http://www.openprocessing.org/visuals/?visualID=5654

Another example of interactive transformation. I really like the use of the dots and the way the mouse controlls what is happening through clicking and moving.

Examples of Transformation


http://www.openprocessing.org/visuals/?visualID=1015

I think this is a really good example of interactive transformation. I found it really usefull for understanding 3D and rotation and would like to bring these into my interaction.

Transformation

-noun

change in form, appearance, nature, or character.

Monday, March 21, 2011

Final Four

With my panels I wanted the to be a set which gradually developed across the four. I did this because I think design is all about development and expanding your ideas to see what's possible.

With this project I learnt how simple code can create extremely complex images. the use of basic geometric shapes combined with repetition , transparencies and colour can add depth and interest to an image. I was motivated to learn by just experimenting and discovering what could be accomplished.

For the next project I would like to get better at refinment and control of my code. I think I achive this by spending more time at the concept, development and planning stages of my project so I when I get to the final stages I know exactly what I want to achieve.

Panel Four

With panel four I added more square layers and also more colour. As with panel three I was trying to added complexity with out it becoming to overwhelming. I achieved this by adding more lines I tried to make there more white space so the background shapes started to blend in with it.

Panel Three

For panel three I decided to emphasise the grid structure by adding different transparent squares. I think this helps add interest with out becoming to overwhelming because instead of adding more detail it starts to make the background detail harder to see. This means you can look at the image from a distance and not be overwhelmed by detail but when you get up close the complexity emerges.

Panel Two


Final panel two. I used different stroke length over lapping and transparencies to create and image that appears to have blurred lines. For my next panel I want to build on the pattern further to add more complexity with out it becoming to overwhelming.

Panel One

Final version of panel one with chosen colour combination. For panel two I want to build on the grid lines and create more complex tones and with transparencies

Colour Development

The pattern repeated four times using the pattern maker code. I now want to experiment with colour to add depth and interest before build on the overlaying pattern to create my set.
I decided to add a grid structure to the pattern so I would be able to build on it in the next three panels.
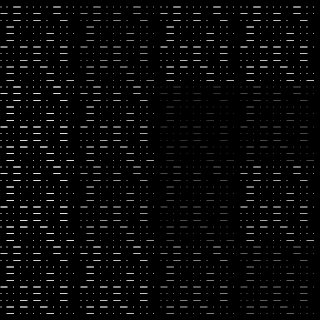
This will be my base pattern for my four panels. I used the Morse code dots and line for 'first year design' and repeated and orientated them to create the pattern. I know I probably could have achieve a similar result by using random circles and rectangles however I liked the control I had over the placement of the elements. I think if I had of done random shapes it would not have the same effect or meaning.

Thursday, March 10, 2011

Four Sketches


Four Sketches

I want my four panels to build on each other starting with the dot line pattern the building to form more of a textural pattern

The sort of pattern I like, and road I would like to go down for my final wall papers

more experiments


Instead of using dots and line to start off making the pattern I used ellipse and rectangles. This will give me more options with overlapping and using different strokes to create different effects.


Experimenting with transparency and stroke width


I decided to use morse code as the base for my pattern development. This pattern has been created using the words 'first year design' in morse code and repeating them over and over. I would like to try playing round with different stroke width and overlapping to see what pattern this would create